How to install openRuyi Server
This article explains how to install and use the openRuyi Server Edition. The openRuyi Server Edition provides a standard operating system environment for physical servers, virtual machines, and edge computing nodes.
Before You Begin
You will first need to obtain the openRuyi image files and the corresponding checksum files from the openRuyi download page.
Verify Image Integrity
We provide SHA256 checksums for all image files. You may use any tool that supports the SHA256 algorithm to verify the integrity of the downloaded files.
If the sha256sum command is available on your current system, place the checksum file in the same directory as the installation image and run the following command:
$ sha256sum openruyi-xxxx.xx-Server-dvd.iso
Installation Requirements
Before starting the installation, please note the following:
-
Prepare either a DVD or a USB flash drive to write the ISO installation image.
- If you are installing on SG2044, you may instead prepare an NVMe SSD for the ISO installation image. Additionally, you will need an SD card for the EDK2 firmware.
-
Prepare another drive as the target disk for the openRuyi system.
All data on the target disk will be overwritten. Please back up any important data in advance.
Boot from the Installation Media
To start the installation process, insert the DVD into the optical drive, or connect the USB flash drive or other installation media, and then power on the machine.
- If you are installing on SG2044, simply install the NVMe SSD containing the installation image together with the SD card.
Install the System
If the following screen appears, the installation media has booted successfully.
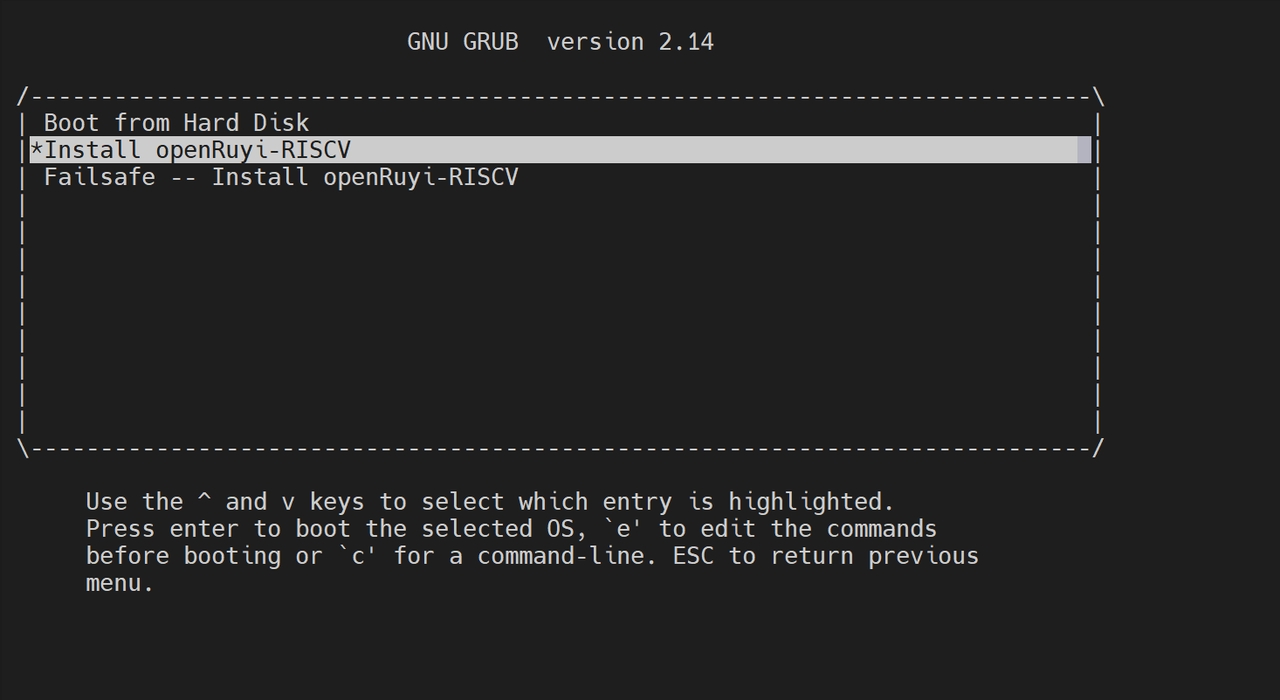
As indicated on the screen, use the Up Arrow, Down Arrow, and Enter keys to select the desired option. Here, choose Install openRuyi-RISCV.
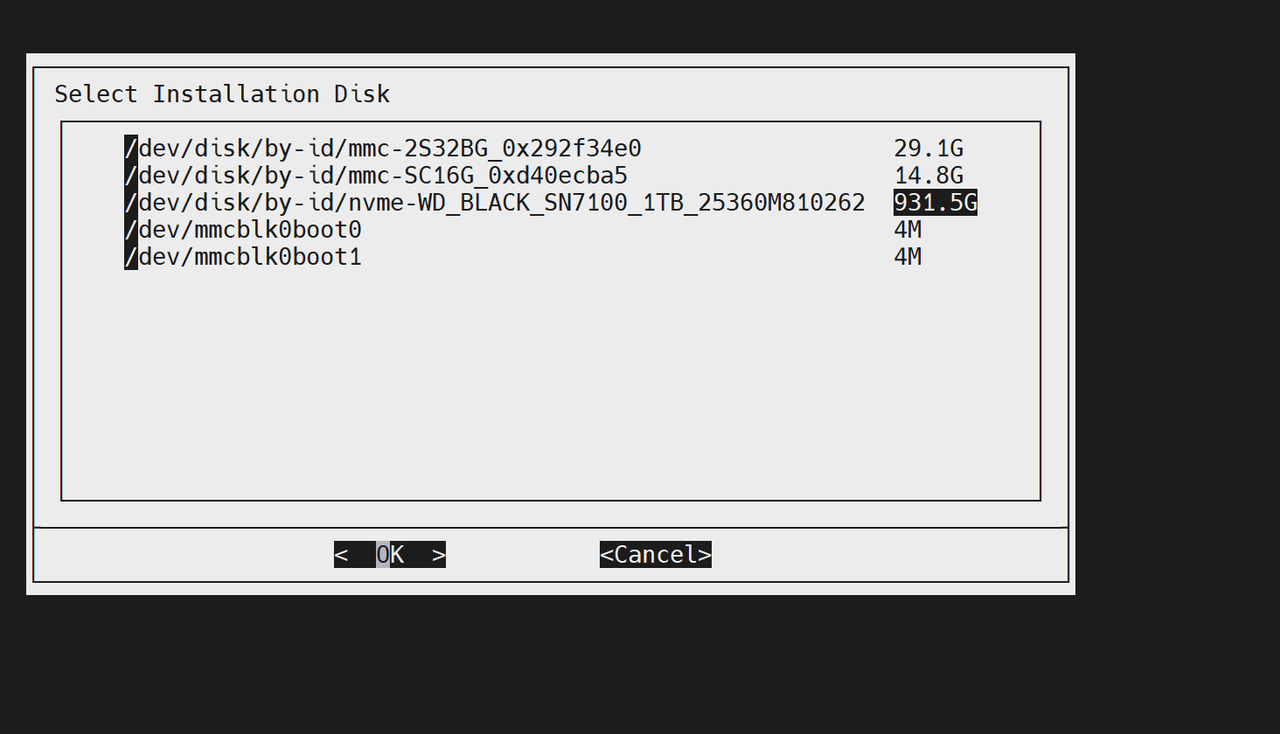
Configure Storage
The next step is to configure storage. Carefully select the disk to use for installing openRuyi.
Once the disk is selected and confirmed, the entire disk will be formatted.
Write the System to Disk
After the installer has collected all required information, it will begin writing the system to disk and display the installation progress.
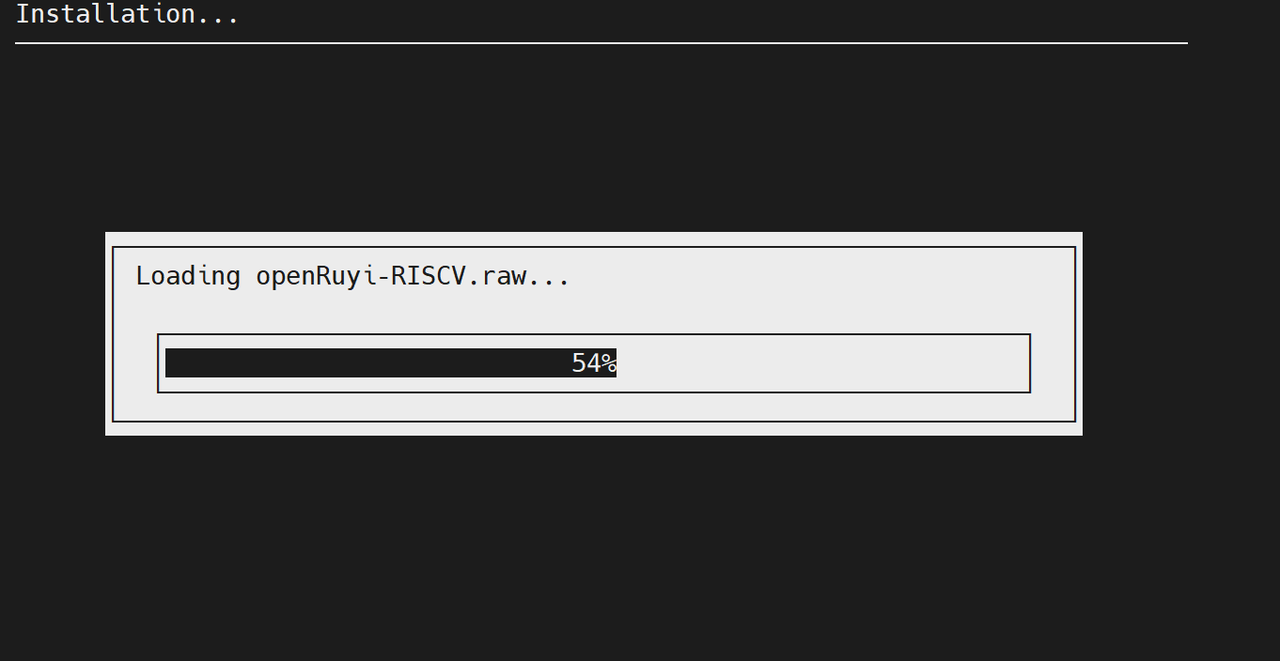
The installer deploys a streamlined yet practical software set required for a server system. After installation is complete, you may install any additional software as needed.
Installation Complete
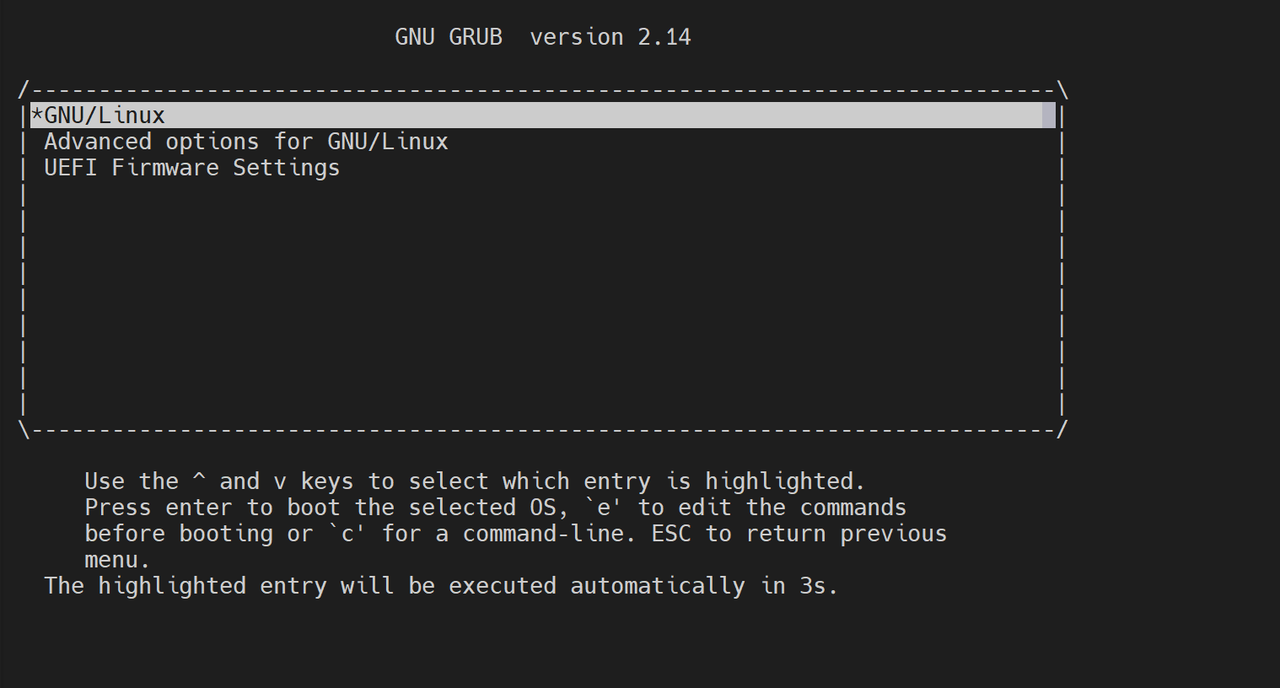
Once installation is complete, the system will reboot automatically. Please remember to remove the installation media.
If you see the following screen, the installation has completed successfully. Welcome to openRuyi!
Log In to the System
After the system has booted, you can log in using one of the following accounts:
root/openruyiopenruyi/openruyi
root account cannot be used for remote SSH login.